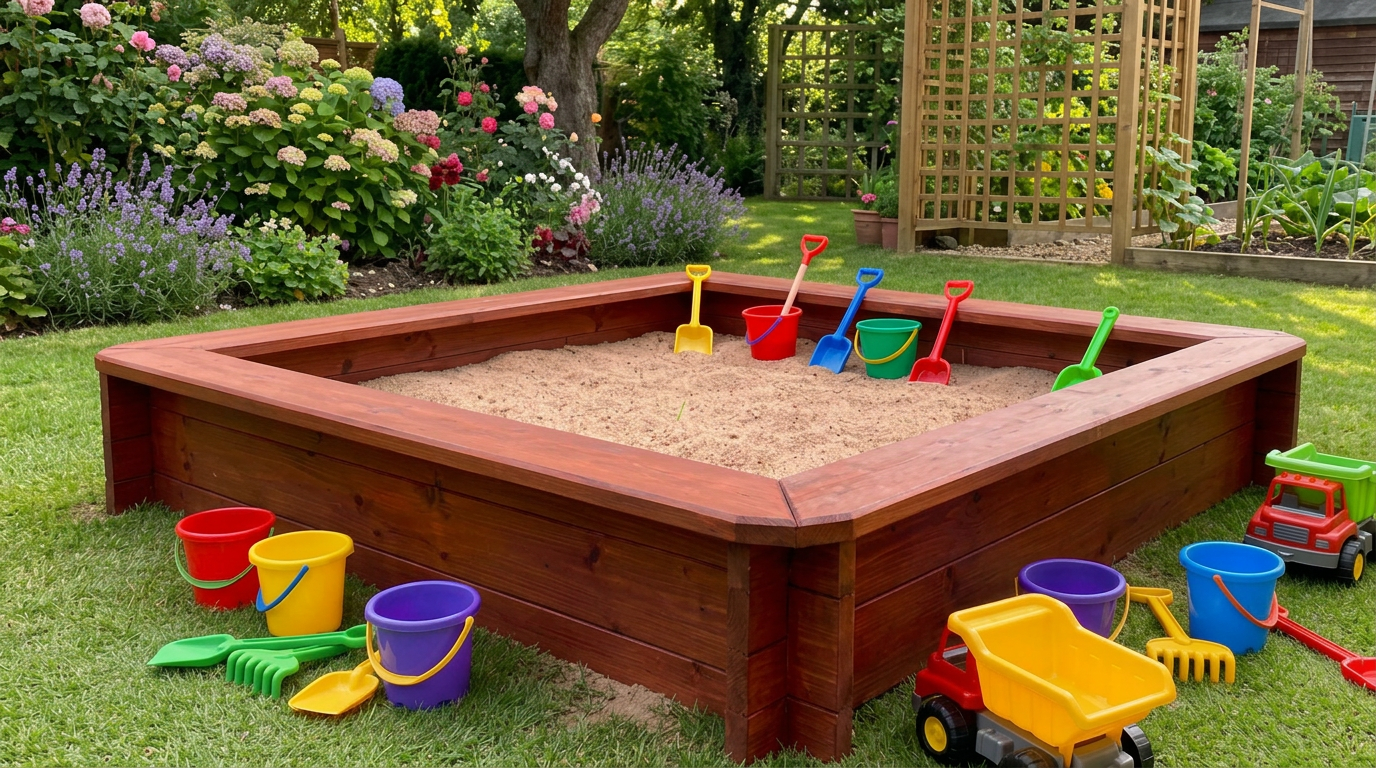
Creating the Perfect Sandpit Setup at Home
A sandpit can be a simple but highly rewarding addition to your garden, giving children a dedicated and safe space for creative play.
To help you create a sandpit that works well for both your family and your outdoor space, while also standing the test of time, here are five key points to consider.
Choose the right location
Although it may seem obvious, choosing the right position is an important first step.
Ideally, the sandpit should be placed in a partly shaded area. This helps protect children from strong summer sunshine and can also reduce the risk of the sand becoming oversaturated during heavy rain.
The location and construction should also allow water to drain away easily.
Use the correct sand
Whether you are building your own sandpit or buying a ready-made option, choosing the right sand is essential.
Many sands used in construction, particularly sharp sand, are coarse and can cause skin irritation or abrasions. They are not suitable for children’s play areas.
Specialist play sand is the safest choice because it is washed and graded specifically for play. Washing helps ensure the sand is hygienic and free from contaminants, while grading creates a softer texture that is more comfortable for children.
Other softer sands may be available, but they can sometimes stain clothing.
Decide whether to build or buy
There are many ready-made sandpits available, but it is also possible to build your own.
Timber is often a good choice because it can be made safe and weather-resistant relatively easily. If you build your own, make sure the structure is strong, all hard or sharp edges are smoothed, and the timber is treated to withstand outdoor conditions.
A water-permeable membrane should be fitted at the base to allow rainwater to drain away. It is also worth including a lid, either removable or hinged, to protect the sandpit when it is not in use.
Maintain safety and hygiene
A cover will help protect the sand from the weather, foreign objects and animals, all of which can make the sand dirty or unsafe.
Even with a cover, the sand should be checked regularly for potentially harmful items. Replacing the sand periodically will also help maintain hygiene.
It is important to consider the area around the sandpit too. Loose sand can create a slip hazard when children are climbing in and out.
Using play bark around the sandpit can improve safety. It provides a weather-resistant, natural-looking and cushioned surface that can also be used around other garden play equipment, such as swings and slides.
Consider size and depth
The size and depth of a sandpit are often overlooked.
A smaller design may be suitable for toddlers or compact gardens, but older children will need more space to dig, build and play. A larger sandpit may offer better long-term use, although the available garden space will naturally influence the final size.
Depth is also important. If the sand is too shallow, it can quickly be displaced and may not provide a suitable play surface.
However, making the sandpit too deep will increase the amount of sand required and may mean building higher walls, which can make construction more complicated. This applies whether you are building your own or buying a pre-made sandpit.
Final thoughts
Creating a dedicated sandpit and play area does not need to involve a major investment, but careful planning will help ensure it remains safe, practical and enjoyable for years to come.
Choosing the right materials and construction method is essential. Adding buckets, spades, moulds and other suitable toys will also help children make the most of their new play space.
Visit the Mainland Aggregates Ltd website for more information on Creating the Perfect Sandpit Setup at Home
ENQUIRY FORM